Changing Brew Element, Steam Series
Step 1: Remove top front panel and lower front panel
 1. Turn off the main breaker (high voltage) and main power switch (main power, covered by rubber gasket). Unplug the power cord from the wall. Turn off water at water source.

 10. Remove screws on lower front panel


2. Remove the cup tray
3. Remove the front panel screws (5 for two group, 6 for three group)
4. Remove screws from center support on the inside of the panel (3 for two group, 4 for three group)
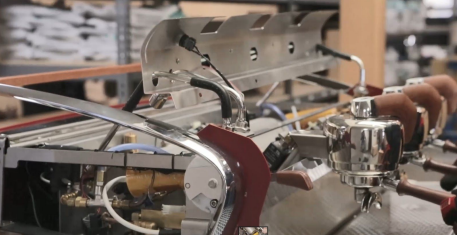
5. Turn steam wands around to face the inside of the machine
6. Remove the water spout tip, and Steam Wandom. Spin towards the group head and into the machine.
7. Lower the steam actuators
8. Disconnect the water button
9. Lift the panel straight up and rock backwards with the curve of the steam wands.
11. Disconnect any lights or buttons connecting the front panel to the machine
12. Remove the panel and set aside
Step 2: Remove Element from Machine
1.Open ball valve dedicated to group to drain water from boiler. Note: There will still be excess water at the bottom of the group when removing the element.
2. Disconnect the terminals at the high limit switch
3. Remove heat shrink around element to access screws
4. Use screw driver to remove screws from element
5. Use 9/16 fitted wrench or socket wrench to loosen the 4 bolts holding the element. This will break the vacuum in the tank and allow water to drain through the ball valve. When loosening, place towels under element to catch access water.
6. Once water is no longer draining from the machine ( check the exhaust hose for any draining water) remove the 4 bolts
7. Remove element and element gasket and set aside.
Step 3: Install New Gasket and Element
1. Install new gasket and element
2 Install washer and nut. Tighten with a 9/16 socket wrench or fitted wrench. Start by lightly tightening all bolts then working on opposite ends. Continue to tighten until the gasket has compressed slightly
3. Remove screws from new element and re attach wiring
4. Re connect terminals to high limit switch
5. Close ball valve dedicated to brew tank.
Step 4: Reconnect Top Front Panel
1. Reconnect display cable
To test the element and verify there are no leaks, the machine needs to be on and heating. Plugging in the display connection put leaving the top and lower panel unassembled will allow room to work on the element if needed.
Step 5: Test Element is Working and Look for Leaks
1. Plug machine in to power source
2. Turn on low voltage toggle switch. Do not turn on high voltage breaker at this time
4. Actuate group head paddle until water disperses and the brew tank is fully saturated
3. Look for leaks around the element. If there are leaks, tighten bolts with socket wrench until leak stops. Make sure the element and the space around the element are dry
4. Turn on high voltage and verify the brew tank is heating by looking at the temperature on the screen
5. Turn off high voltage and low voltage switch
Step 6: Reinstall Lower Front Panel and Top Front Panel
1. Screw in lower front panel, making sure there are no cords between the panel and the frame
2. Plug in any unplug connections from the lower front panel to the machine
2. Reinstall top front panel and tighten down
3. Turn on low voltage and high voltage, re verifying everything works as intended
Related Articles
Brew Gauge - Espresso Series
Brew Circuit Gauge Characteristics & Troubleshooting - Espresso V3 & Single Group, Steam Single Each group on a SLAYER Espresso V3 & Single Group features a gauge connected directly to the brew tank. Brew gauges indicate several hydraulic brew ...Eltek Transducer Retrofit - Steam Series
Technician's retrofit guide for Steam Series. SLAYER recommends all service be performed by an experienced SLAYER Espresso trained technician. For a technician reference near you, please contact SLAYER Support at (206)-284-7171 (#1 in Directory) or ...Error Code Identification - Steam Series
Steam X, EP, & LP Error Code Identification Error codes replace the temperature and/or pressure value (observed on the display) of the faulted circuit. Brew Circuit AL1: Group temp probe (thermistor) is interrupted or disconnected. Disables group's ...Error Code Identification - Steam Single
Steam Single Error Code Identification 015 - Reservoir Low Water Level Low water level in reservoir 016 - Brew Actuator Position Error Software detected an electronics failure of actuator switch contact. 051 - Steam Pressure Sensor Detected an ...Catch Test - Steam Series
Clear Water Catch Test - Steam LP & EP SLAYER calculates the flowrate (water debit) of Steam Series machines by measuring the dispensed amount of water, in grams (milliliters), against time, in seconds. Measuring flowrate allows a technician to ...